This is the second post in a series of tutorials to help my kid learn some of the more technical aspects to recording and music production. After recently buying him a PreSonus TubePRE preamp, I realized he may not know exactly how to use it.
What is a Microphone Preamp?
A microphone preamp is a signal amplifier that can boost the signal level and can enhance the quality of the signal by adding color, such as emphasizing certain harmonics in the source signal. That is, a preamp can add mild distortion to your signal (vocal or otherwise) to add a desirable color to the tone.
Sometimes, the stock preamps built into an interface, such as a Focusrite Scarlett 2i2, can be extremely clean. Using a preamp can add a bit of analog warmth missing from modern digital signal conversion (analog-to-digital).
Great! How do I use it?
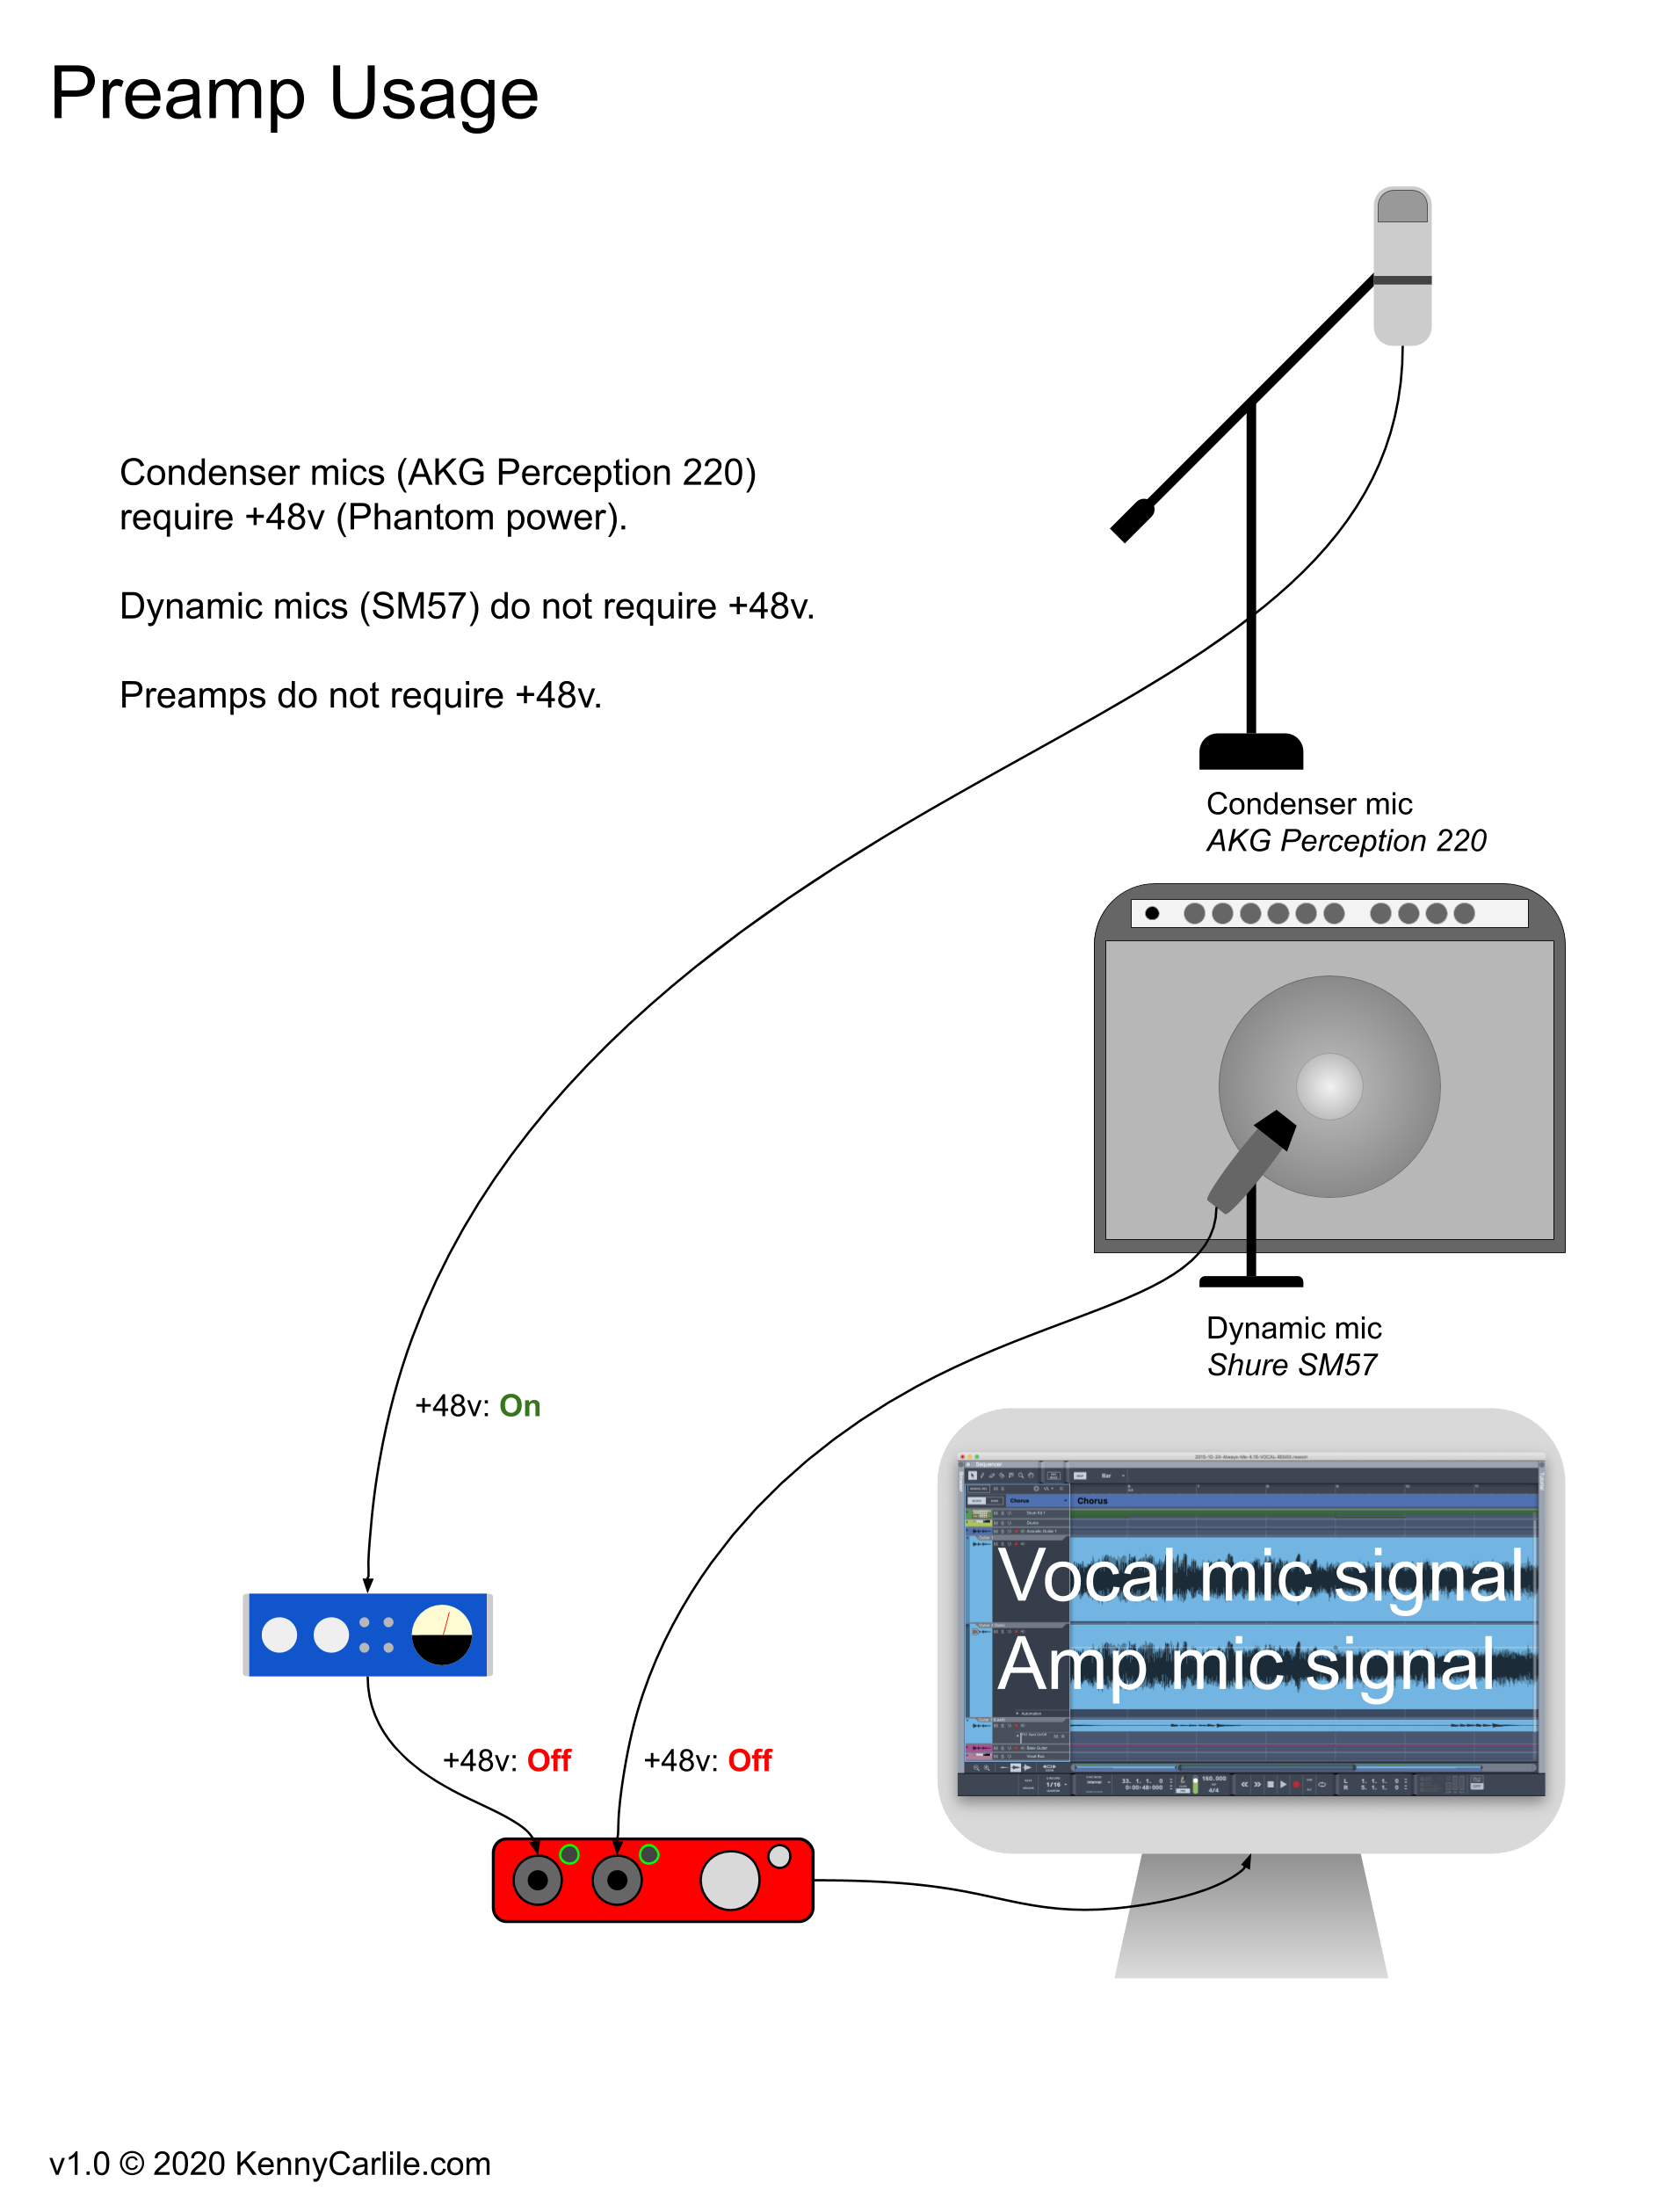
The preamp goes between your microphone and the interface and it does not require +48v (Phantom power). You should set your interface’s input to be line level, rather than instrument level, for the line coming from the preamp and +48v should be disabled on the interface. You will want to use a balanced cable, either TRS or XLR input, when connecting your preamp to the interface.
Now you’re ready to plug your microphone into the preamp. If you’re using a dynamic mic, such as a Shure SM57, +48v should be disabled on your preamp. If you’re a condenser mic, such as an AKG Perception 220, you’ll need to enable +48v on the preamp to power the condenser microphone.
Your preamp will generally have a drive and gain control. These may be labeled something else, such as input and output. Regardless of the naming convention, you can think of these like pre-volume and post-volume where the pre-volume impacts the distortion and the post-volume impacts the line level after the distortion has been applied.
Your preamp may have other controls as well, such as:
- Ø - phase inversion
- PAD - some decibel level of input reduction or padding
- Low-pass filter - reduction in low frequencies, such as an 80Hz low-pass filter
If your interface has auxiliary inputs on the back, your best approach is to use a balanced TRS cable to connect your preamp to your interface. This will free up your front-mounted combination inputs (1/4” and XLR compatible Neutrik NCJ6FI-S style jacks) for other inputs to be used later.
So what about Gain Staging?
Gain staging is a tricky topic that is much larger than this article can address. In short, you need to balance your signal level with the preamps drive and gain levels and your interface’s input level. That is, you don’t want to drive one of these too hot or you may end up distorting your signal in a way you haven’t intended. You’ll want to carefully adjust your various gain stages in your signal path for the desired sound. Generally speaking, you’ll want to get the tone coloration from your preamp’s drive level and then set your other levels for the most headroom to retain signal integrity.
Other Uses
You can use a preamp for coloring a clean signal or for boosting a quiet microphone such as a ribbon mic. You can also use it to add a little analog warmth to a direct signal from bass or guitar or even synth.